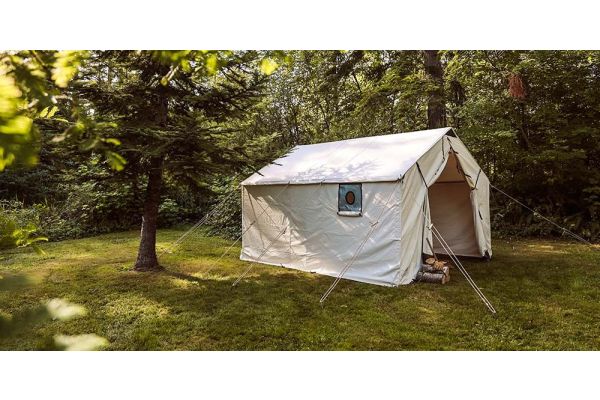
Sayler's Centennial Wall Tent Adventure
Hi! My name is Sayler, I am a Rainier Outdoors Lead Product Developer. In other words, I get to review, test, and improve products! Not only do I care about the production of our products, but how it looks, feel, and perform, from the customers' perspective. I am an outdoor, camping, backpacking, pine-smelling, forest-dwelling, trail-finding enthusiast. I know the value of weather withstanding shelter and comfort on a cold snowy night. Snow camping in a centennial wall tent was a winter wonderland dream.
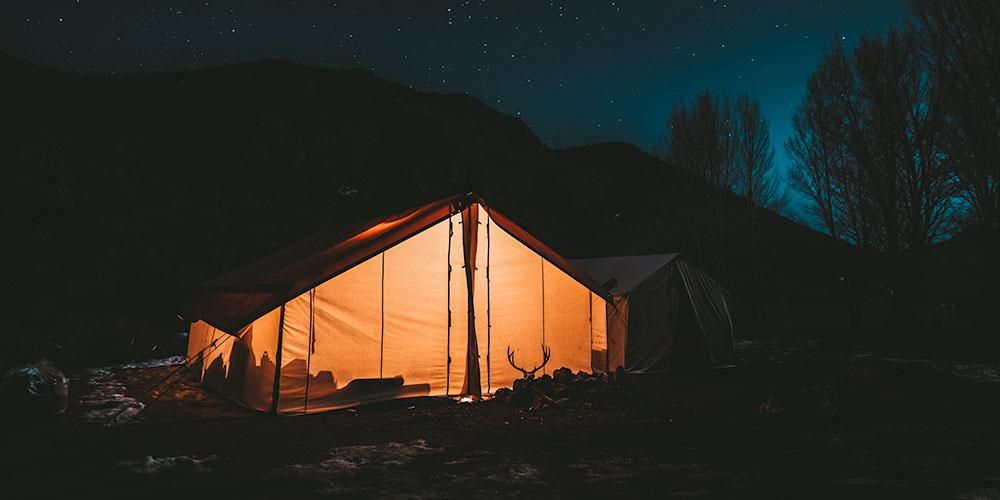
“Freeze Your Buns 2019” is the snow camp trip my friends and I was planning on embarking on in standard camping tents. Getting closer to our date, the weather proved it was going to be more damp and wet, than snowy. What a perfect time to test out a Rainier Outdoor Centennial Wall Tent, with a Q Stove!
Snow Camping In a Centennial Wall Tent: The Set Up
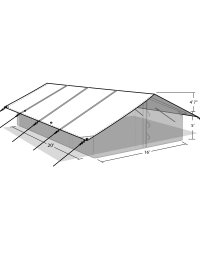
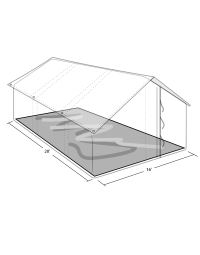
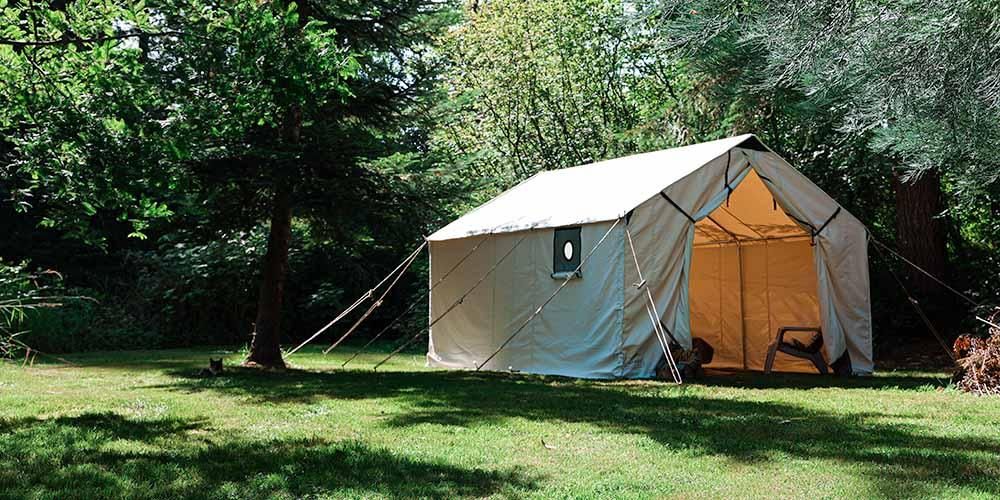
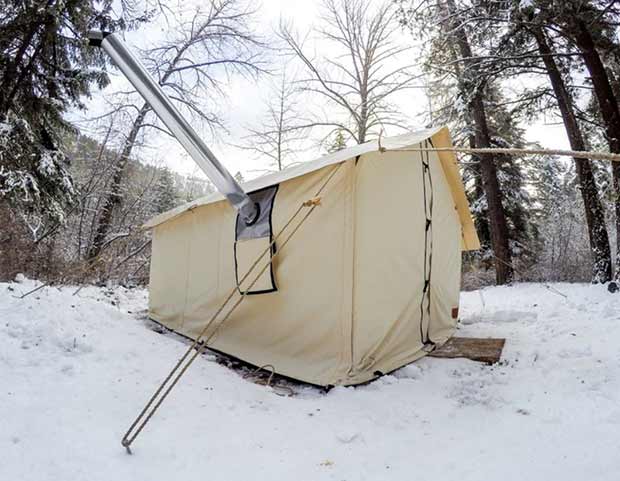
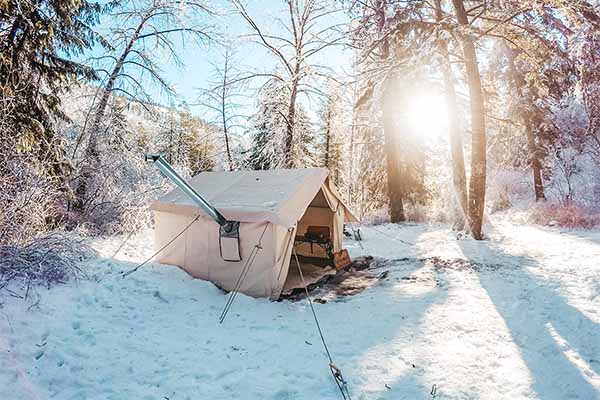
We arrived at our resting spot at 1 am, Friday night near Taneum Creek, WA., off a forest service road. In the glow of our truck lights and headlamps, we began clearing a flat area of its 5” of snow to set up our tent. While a team of two finished shoveling snow, the other two began the setup. Rainier Outdoor metal poles are bunched into 3 groups, Rafters, Tent Lengths, and Legs, along with a bag for the pole connections. Cold, tired, and ready for a warm bed, the 32 frame pieces to set up this tent were daunting, until noticing all the poles were clearly labeled! I am happy to report that the actual setting up of the 10'x12' Centennial Wall Tent with a rain fly was the easiest task of that cold night.
Wall Tent Pitching Guide
Here is what we accomplished in 12 minutes!
- A set of 2 poles equals one full-length pole; this makes 6 Rafter poles and 6 Tent Length Poles
- Layout all poles and connections (leaving legs to the side), pole lengths going long ways, and rafters going width
- Connect Rafter and Length Poles to create the 1st bay, then the 2nd.
- Add your height! Attach 3 legs to ONE side
- Unroll your tent along that same side of the frame (The whole tent is one piece!)
- Find the bottom corners- your tent is folded right side out. Lift fabric up and over the frame, shifting all-pole connections into their corner pockets.
- Finish your height! Add the remaining 3 legs to another length of the frame.
- Stake down tent using black O Ropes and 12” stakes
- Use provided rope to loop and knot through the grommets at the roof ends and stake down the end of the rope.
- NOTE: Cotton Army Duck fabric can continue to shrink as much as 4% even after being wet several times, it is important to stake all grommet points out, so the tent is in its true taut form.
*SNOW TIPS: Shovel snow 1 foot away from your tent so stakes are easier to find. Make sure your connections are free of snow build-up, this would prevent a secure fitting.
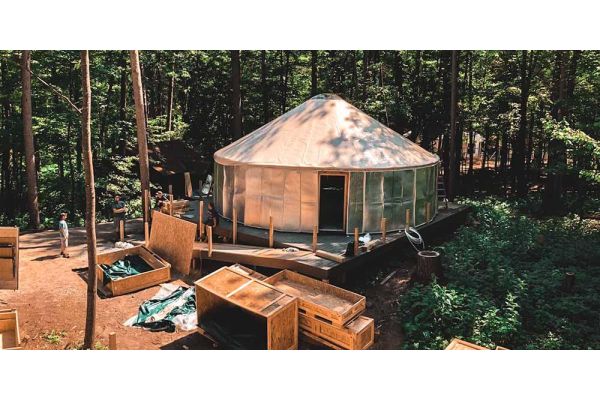
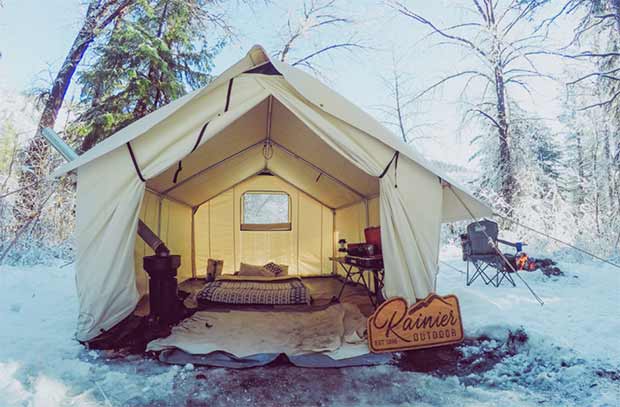
The Stove
Once our tent was up, we brought in our pellet stove and fed the stove pipe through the stove jack that comes standard with the Centennial wall tent. Following the directions, we let it burn outside in the open air for about 45 minutes the day before to cure the paint and keep us safe from unwanted fumes.
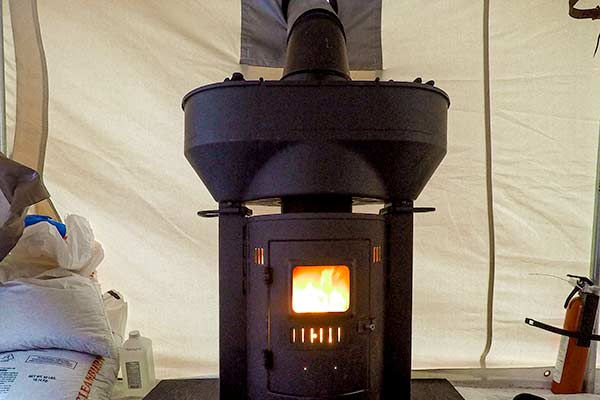
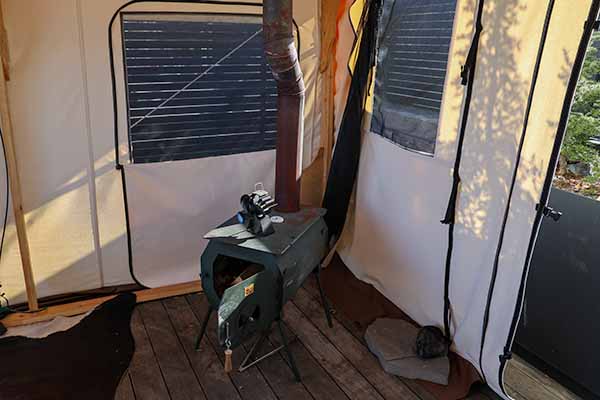
We kept the stove 3’ from the wall and had a fire extinguisher nearby. The Rainier Outdoor Wall tents are made from a Fire-Resistant Army Duck fabric, but you can never be too safe! We filled the hoppers and chambers full of pellets, set the damper to a low setting, lit the flame, and took note of the temperature inside and out throughout our stay.
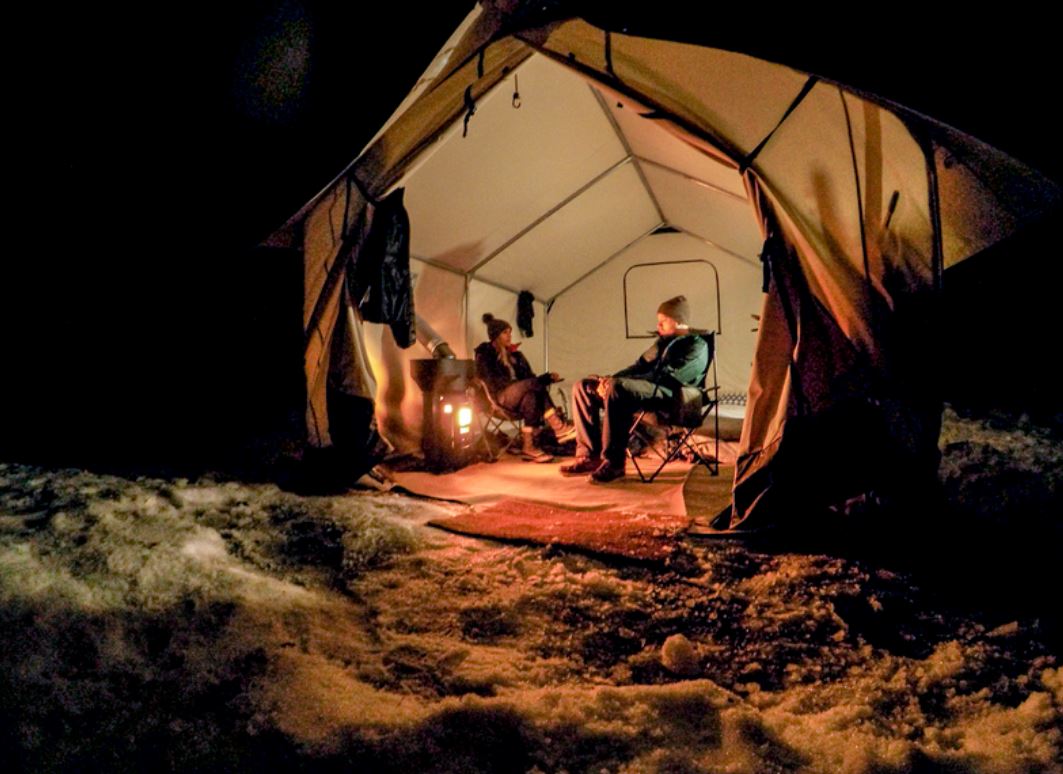
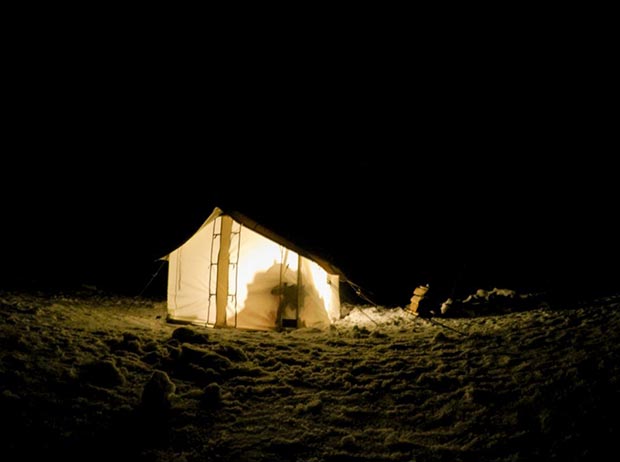
Tired But Warm
We clocked out at 2 am, beds were made and the tent was warm. The following day we woke up to our stove STILL BURNING! The gravity feed and thick walls in our tent allowed us to have a comfortable, warm 5-hour sleep with only a small temperature decrease in our tent. During the day, outdoor temperatures were around 36-42 degrees, dropping down to 29-34 during the night. Our Tent stayed at a consistent 65 degrees, this is why snow camping in a centennial wall tent with a Q-stove is my new fave! We did a little experimenting with the stove, we allowed the stove to burn empty of pellets. Then we re-filled it and lit it when it was 35 degrees inside the tent. Within 45 minutes the temperature increased by 30 degrees all the way to 65! In that same experiment, we concluded that one 40lb bag of pellets will last 6 hours on high with gravity assistance.
Snow Camping In a Centennial Wall Tent: The Second Night
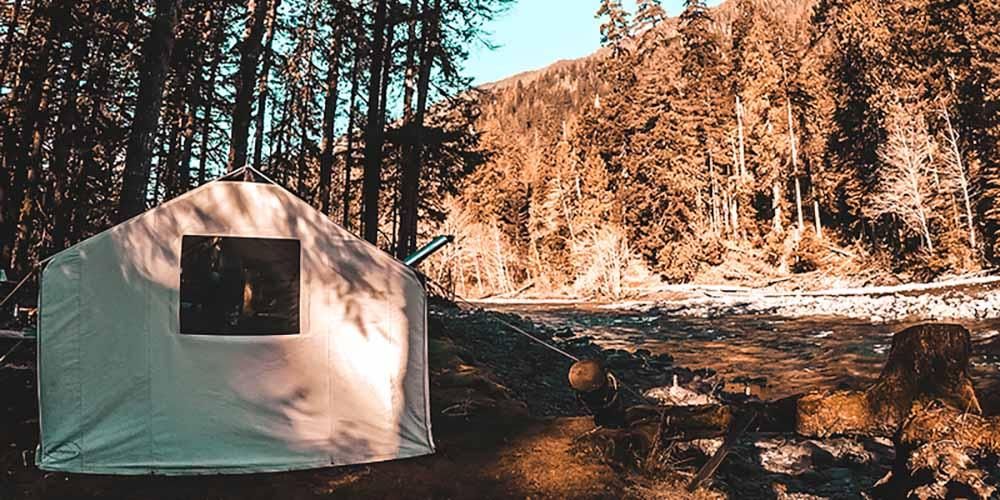
The second night the rain was brutal, so we stayed in our nice warm tent. I quickly regretted ignoring my husband’s advice on testing the proper Rainier floor with our tent, instead of overlapping pieces of thick vinyl. Not having the flooring was a great lesson on how important it is! While our bedding was mostly dry, a puddle began to form at the front of the tent from rain and melting snow. A Rainier Wall Tent Floor would have prevented this! We slept well and woke up in the morning to 4” of fresh snow sliding off our Rain Fly, the rain turned to snow. YAY!
Snow Camping: Take down
The tent was as easy to take down as it was to set up, though a zip-up or draw-string bag would be very nice for the poles, as well as a larger bag for the tent, most campers know how that goes. To make it more user-friendly, we are looking into making this happen! Once we were home we set up a tent in the sun and allowed it to dry. Once it dried, the mud and dirt it accumulated easily brushed off, this material is incredible! In spots that needed extra care, I sprayed water on the area and the dirt beaded off and dripped down.
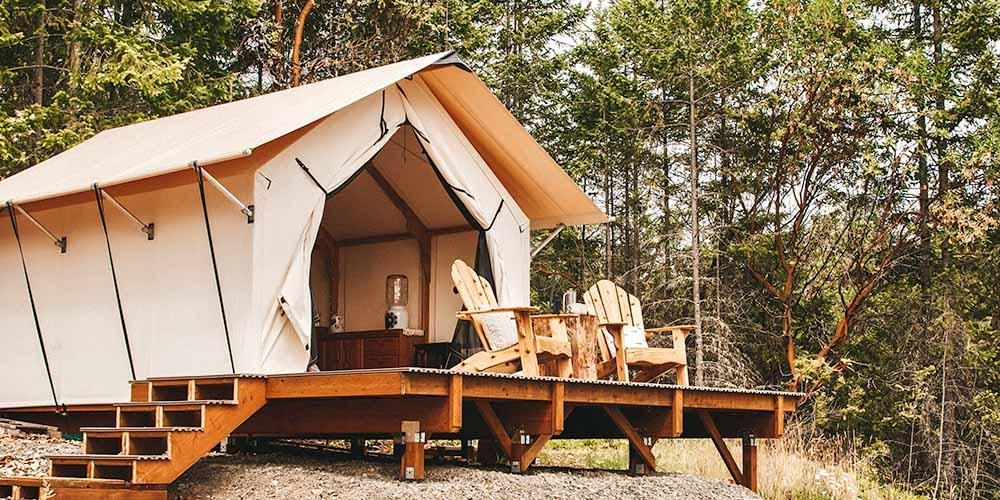
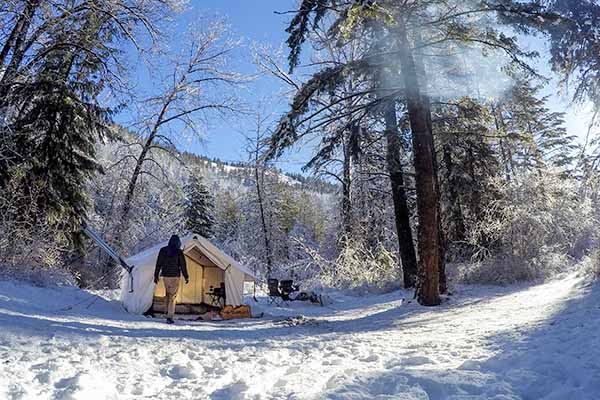
All in all, it was a great, easy experience. The Centennial Wall Tent is specious. We fit 4 adults, 3 small dogs, a small table, our cooking stove, and the pellet stove. If we brought our individual tents we would have been crammed in one during the rain, just to be together, and would have had to make dinner out in the cold! All fit tight but cozy and functional in our 10x12 wall tent. We were so happy that we didn’t have to freeze our buns after all!
If you enjoyed this post give it a like, leave a comment below, and share it with your friends. You can also follow us on Facebook, Instagram, and Pinterest.